Zanata CLI Installation
NOTE: You will need to install Credentials Binding Plugin to use this option.
Global Configuration
- Go to 'Manage Jenkins'
- Go to 'Global Tool Configuration' (For Jenkins 1.6.x, tools configuration is under 'Configure System')
- Scroll down until you find 'Zanata CLI', then click on 'Zanata CLI installations'
- Click 'Add Zanata CLI' to open up an installer
- Check 'Install automatically' if applicable
- Input a version for the Zanata CLI you want to install. The version will become part of the tool name.
- Change the 'Download URL for binary archive' and 'Subdirectory of extracted archive' according to the version you want to install (note: Subdirectory must match what's in the zip/tar.gz. You should only need to change the version number in the template)
- Repeat previous step if you want to install multiple version of Zanata CLI
- Click 'Save'

Individual Job Configuration
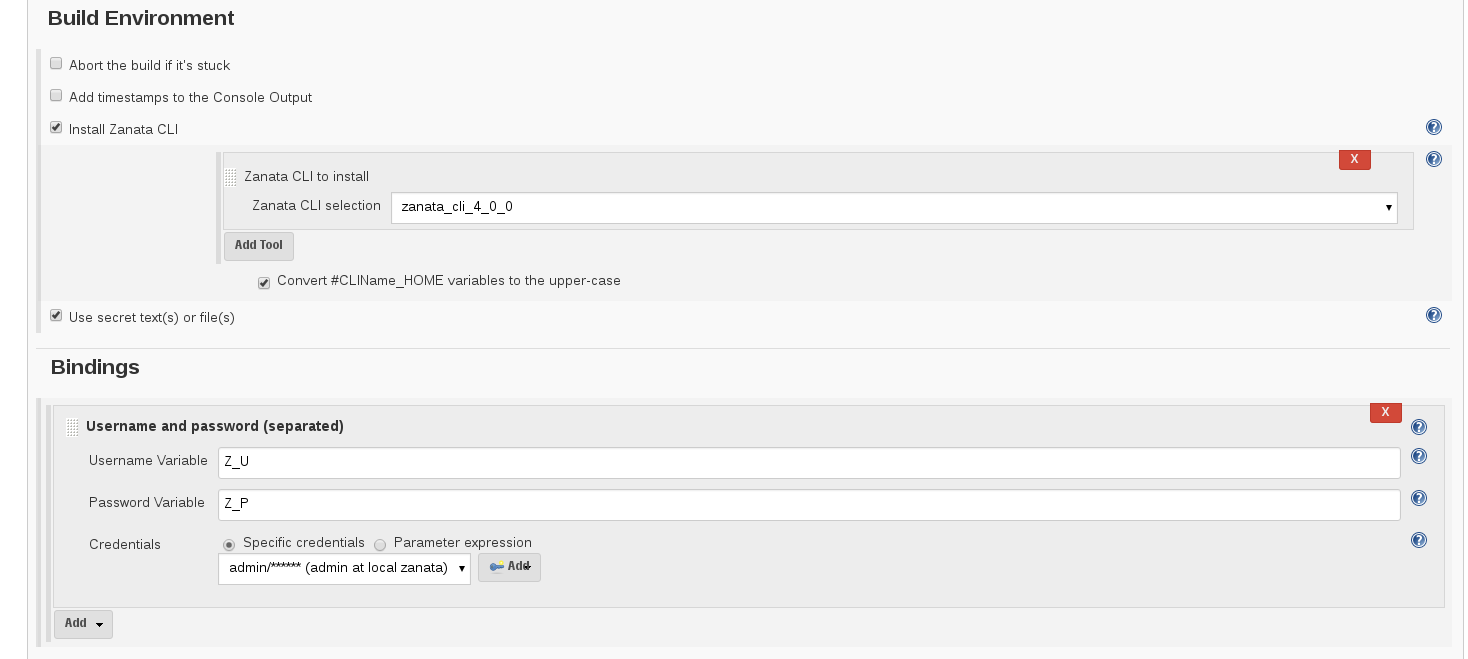
Under 'Build Environment' section:
- Check 'Install Zanata CLI' then in its opened configuration
- Click 'Add Tool'
- Select the CLI from the dropdown in 'Zanata CLI selection'
- Optionally check 'Convert #CLIName_HOME variables to the upper-case'
- Check 'Use secret text(s) or file(s)' (from Credentials Binding Plugin) then
- Select 'Username and password (separated)' from the 'Add' dropdown
- Input a username variable name for Zanata username
- Input a password variable name for Zanata API key
- Select the Zanata credential
Use the installed CLI in build
Choose another build step Zanata Sync via CLI
NOTE: You still need to do normal git push in a post build step